
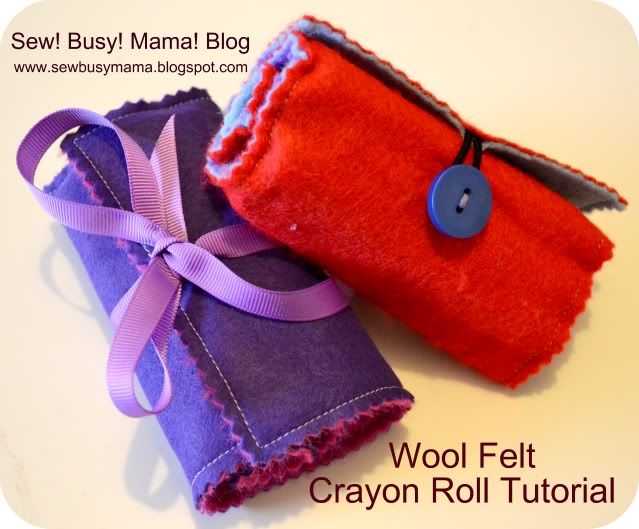
 Materials List: Wool Felt - 2 x pieces: 5 inches x 12 inches (1 x inner layer / 1 x outer layer) & 1 x piece: 3.75 inches x 10.5 inches , Sewing Machine & Thread, Ruler, Scissors, Fabric pen/pencil, 8 Crayola Crayons (standard size). Closing option #1: 1 x Hair Elastic & 1 x Button or Closing option #2: 80cm length of ribbon. Pinking Shears to give your edges are pretty touch (optional)
 Where to buy Wool Felt? I have a supplier that I have been buying my wool felt from for almost 3 years now. The quality of the wool felt and the customer service is fantastic - store link HERE.
-------------------------------------------------------------------------
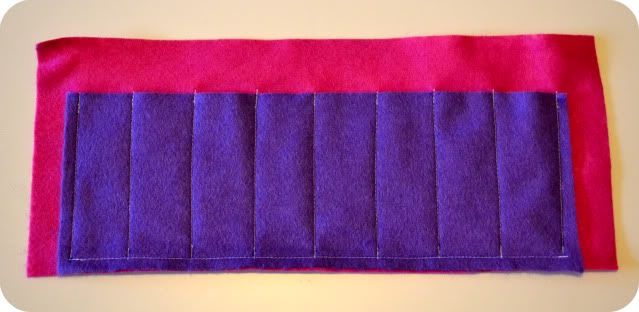
Step 1: Mark out with your fabric pencil, 8 even spaces approx. 1.1 inch apart on your smaller piece of wool felt, leaving approx. quarter of an inch at each end. (I have made my markings in pen so you can see them).
 Step 2: Lay your smaller piece of felt with the marking on top of your inner layer piece of felt in the middle, and lining up the bottom edge, and sew 1/4 inch in from the edge along the bottom edges, to secure these two pieces of felt together, sewing back a few stitches at the beginning and end to secure your stitches.
 Step 3: Sewing your crayon pockets - starting at your first marking, sew from your bottom sewn line up to the top edge of your small piece of felt, sewing back a few stitches at the beginning and end to secure your stitches. Then move on to your next marking and do the same - until your have sewn up from all your markings and have 8 little pockets for your crayons.
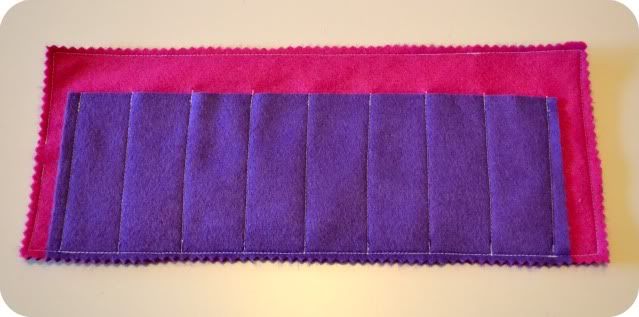
 Step 4: Lay this sewn section on top of your outer layer of felt and sew all the way around the edge using a 1/4 seam allowance and leaving a small opening at one end of approx. 1/2 inch.
(Optional) Step 5: Trim all the way around the edge with your pinking shears to make it look pretty.
 -----------------------------------------------------------------------
Finishing (Closure #1 - Ribbon):
Step 6: Fold your length of ribbon in half and insert the folded end into your opening of the felt pieces approx. 1/2 an inch and sew over 2 - 3 times to secure.
Step 7: Fill your pockets with your 8 crayons, roll up and wrap the ribbon around and tie with a bow. 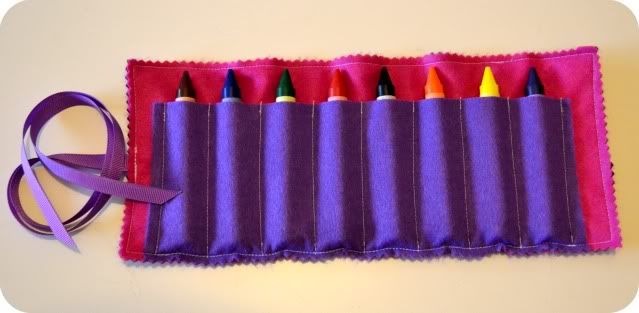

--------------------------------------------------------------------------------
Finishing (Closure #2 - Elastic & Button):
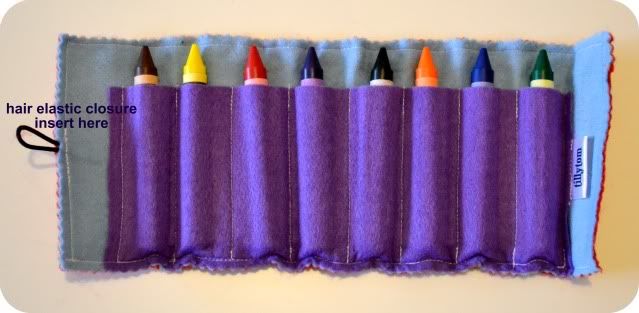
Step 6: Insert your hair elastic into your opening of the felt pieces approx. 1/2 an inch and sew over 2 - 3 times to secure.
 Step 7: Fill the roll with your 8 crayons and roll up. Pull your elastic tie a little to find the right spot to sew on your button to the back of the crayon roll and pop a small mark here with your fabric pencil. Unroll and hand sew your button on being careful not to sew through your pocket layer of felt on the inside of the roll. Roll up your crayon roll and loop your elastic over the button to secure.
 Your finished! Well done! Any questions with this tutorial please do not hestiate to ask : )
***Copyright note: I am happy for you to use this tutorial to make crayon rolls to sell, but please give credit where it is due by crediting this pattern/tutorial to myself. (i.e. Crayon Roll design/pattern by Sew!Busy!Mama! Blog)***
Happy sewing!
So cute!! Do you find felt kills your pinking shears?? I'm a bit scared of using my new Fiskars ones on felt. Love Posie
ReplyDeleteThankyou Posie x And yes, the felt has definitely made my shears blunt! Don't use your new ones!
ReplyDeleteI love it thanx alot!
ReplyDeleteDefinitely going to be trying this one out very soon!
ReplyDeleteMaking this today! Found super cute lady bug felt at Hobby Lobby...it is kind of thicker, so it should work. I'm a novice at sewing but I think it doesn't look so hard.
ReplyDeleteI did it!!! Thank you so much for the easy instructions!!! My 7 year old loves to watch me sew, and she already claimed the crayon roll as her very own :)
ReplyDeleteWow! Great tutorial! Thank you!!!!!!!!!! I will definately try!!!
ReplyDelete